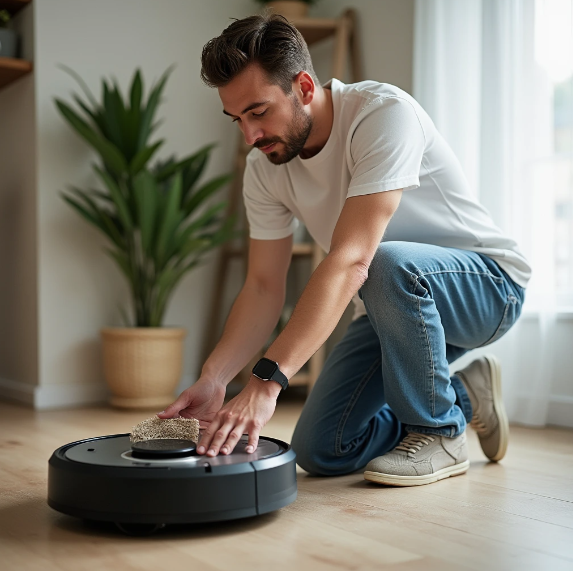
Robot vacuums (see on Amazon) have become a game-changer in modern cleaning, offering convenience and efficiency. However, just like any other cleaning device, these nifty machines need maintenance and care to continue functioning at their best. Regular cleaning of your robot vacuum can help extend its lifespan, improve suction power, and ensure a more effective cleaning performance.
In this guide, we’ll walk you through the essential steps to properly clean and maintain your robot vacuum.
Why is it Important to Clean Your Robot Vacuum?
Before diving into the cleaning process, it’s important to understand why it’s essential to clean your robot vacuum regularly:
- Maintain Optimal Performance: Dirt and debris can clog the motor, wheels, or brushes, reducing the vacuum’s ability to pick up dirt and debris.
- Extend the Lifespan: Just like any electronic device, neglecting maintenance can lead to premature wear and tear. Regular cleaning can help your robot vacuum last longer.
- Prevent Malfunctions: Cleaning the sensors and brushes can prevent issues like the vacuum getting stuck, not charging properly, or failing to detect obstacles.
- Ensure Cleaner Floors: A clean robot vacuum will deliver more thorough cleaning, ensuring better results each time it’s put to work.
Step-by-Step Guide to Cleaning a Robot Vacuum
Here are the simple, yet essential, steps to clean a robot vacuum thoroughly. Depending on the model, the specifics might vary slightly, but these general steps will apply to most robot vacuums.
Step 1: Power Off the Robot Vacuum
Before beginning any maintenance, ensure that your robot vacuum is powered off. This will help prevent any accidental activation while cleaning. You can either turn it off using the power button or remove the battery if it’s designed for that.
Step 2: Empty the Dustbin
The dustbin is the first place to start. A full or clogged dustbin can hinder the suction power of the vacuum. Open the dustbin compartment, remove the dustbin, and empty it into a trash can. If there’s any residual dirt or debris, use a dry cloth or a handheld vacuum to clean it out.
Some dustbins may be washable, so check the manufacturer’s instructions to see if you can wash the dustbin with water. If so, let it dry completely before reattaching it to the vacuum.
Step 3: Clean the Brushes
Robot vacuums have brushes that are responsible for sweeping up dirt and debris. Over time, these brushes can become tangled with hair, dirt, or fibers, which can reduce their effectiveness. Follow these steps to clean them:
- Remove the Brushes: Most robot vacuums have brushes that can be easily removed. Use the included tool or a small screwdriver to detach them from the vacuum.
- Remove Debris: Gently pull out any hair, strings, or debris that may be tangled around the brush bristles.
- Clean the Brushes: Use a damp cloth or a soft brush to remove any remaining dust or dirt from the brush. For deep cleaning, you can also use a pair of scissors to carefully cut away hair or fibers that are wrapped tightly around the brush.
- Reattach the Brushes: Once cleaned, reattach the brushes securely back into their compartments.
Step 4: Clean the Wheels
The wheels of a robot vacuum are crucial for smooth movement. Over time, they can get dirty or blocked by hair and debris. To clean the wheels:
- Remove the Wheels: In most cases, the wheels can be detached for cleaning. If you can’t remove them, use a small brush or cloth to clean the wheel’s surface.
- Check for Obstructions: Inspect the wheel axles for any hair or dirt that could block movement. Gently pull out any debris using tweezers or your fingers.
- Wipe Down the Wheels: Use a damp cloth to wipe the wheels, ensuring they move smoothly.
Step 5: Clean the Sensors
Robot vacuums rely on sensors to navigate your home, avoiding obstacles and mapping out the most efficient cleaning routes. Dirty sensors can lead to malfunctioning or poor navigation.
- Locate the Sensors: Usually, the sensors are located on the bottom of the vacuum or on the front-facing sides.
- Clean the Sensors: Use a soft, lint-free cloth to gently wipe the sensors. Be careful not to scratch or damage the sensors. Avoid using any harsh chemicals; a simple dry wipe is often sufficient.
Step 6: Check for Firmware or Software Updates
Some robot vacuums have the ability to update their software to improve performance or fix bugs. Check the manufacturer’s website or your mobile app (if supported) for any available firmware updates. Keeping your robot vacuum updated can improve its overall functionality and address any bugs or issues.
Step 7: Reassemble and Test
After cleaning, make sure to carefully reassemble all the components. Double-check that the brushes, wheels, dustbin, and sensors are properly reattached and that no parts were left loose. Power on the vacuum and run a test to ensure everything is working as it should. Pay attention to the vacuum’s movement, cleaning performance, and overall behavior.
Additional Tips for Maintaining Your Robot Vacuum

Regular Cleaning:
Clean the vacuum every 1-2 weeks to ensure it’s always in top condition.

Filter Maintenance:
Some robot vacuums have filters that also require cleaning. Be sure to check your manual for any specific maintenance instructions for the filters.

Charging Station:
Don’t forget to clean the charging station regularly to ensure a secure and clean connection for charging.
Maintaining your robot vacuum is crucial to ensure it performs at its best and lasts for a long time. By following these simple cleaning steps, you can help your robot vacuum maintain optimal suction, navigate efficiently, and keep your floors spotless. Regular cleaning also helps prevent malfunctions and costly repairs. So, grab your cleaning supplies, and give your robot vacuum the care it deserves!
By making regular maintenance a part of your routine, your robot vacuum will continue to be a reliable helper in your home for years to come. For more helpful tips on maintaining your appliances and to find the best vacuum options, visit our website at bestvacuumsguide.com (here). We look forward to seeing you there!


